Updated on October 10, 2022
How to Slice in Cricut Design Space. Step by step tutorial on how to use the slice tool in Cricut Design Space plus a video tutorial.
Welcome to Lesson 7 on Cricut Design Space Basics. Today, we are talking about how to use the slice tool in Cricut Design Space. This tool is available in the layers panel and allows you to split two overlapping images or text into different parts. Then, you can use these new shapes individually in the layers panel.

This post contains affiliate links. If you purchase something through the link, I may receive a small commission at no extra charge to you. Please read my full disclosure policy here.
How to Use the Slice Tool in Cricut Design Space

You can use the slice tool to cut out one shape from another shape. It only works with two layers at a time. If you have a multilayered image, you will need to hide or ungroup the other layers to use the slice tool.
The slice tool is the tool to use when you cannot or do not want to layer your materials. Certain iron-on materials – foil, glitter, and holographic, holographic sparkle iron-on – cannot be layered, meaning you can not layer anything on top of them.
Even if you can layer iron-on, sometimes you just don’t want to. Cricut suggests only layering 4 layers of iron-on to avoid making the design too bulky. To create a layered effect without actual layers, use the slice tool.
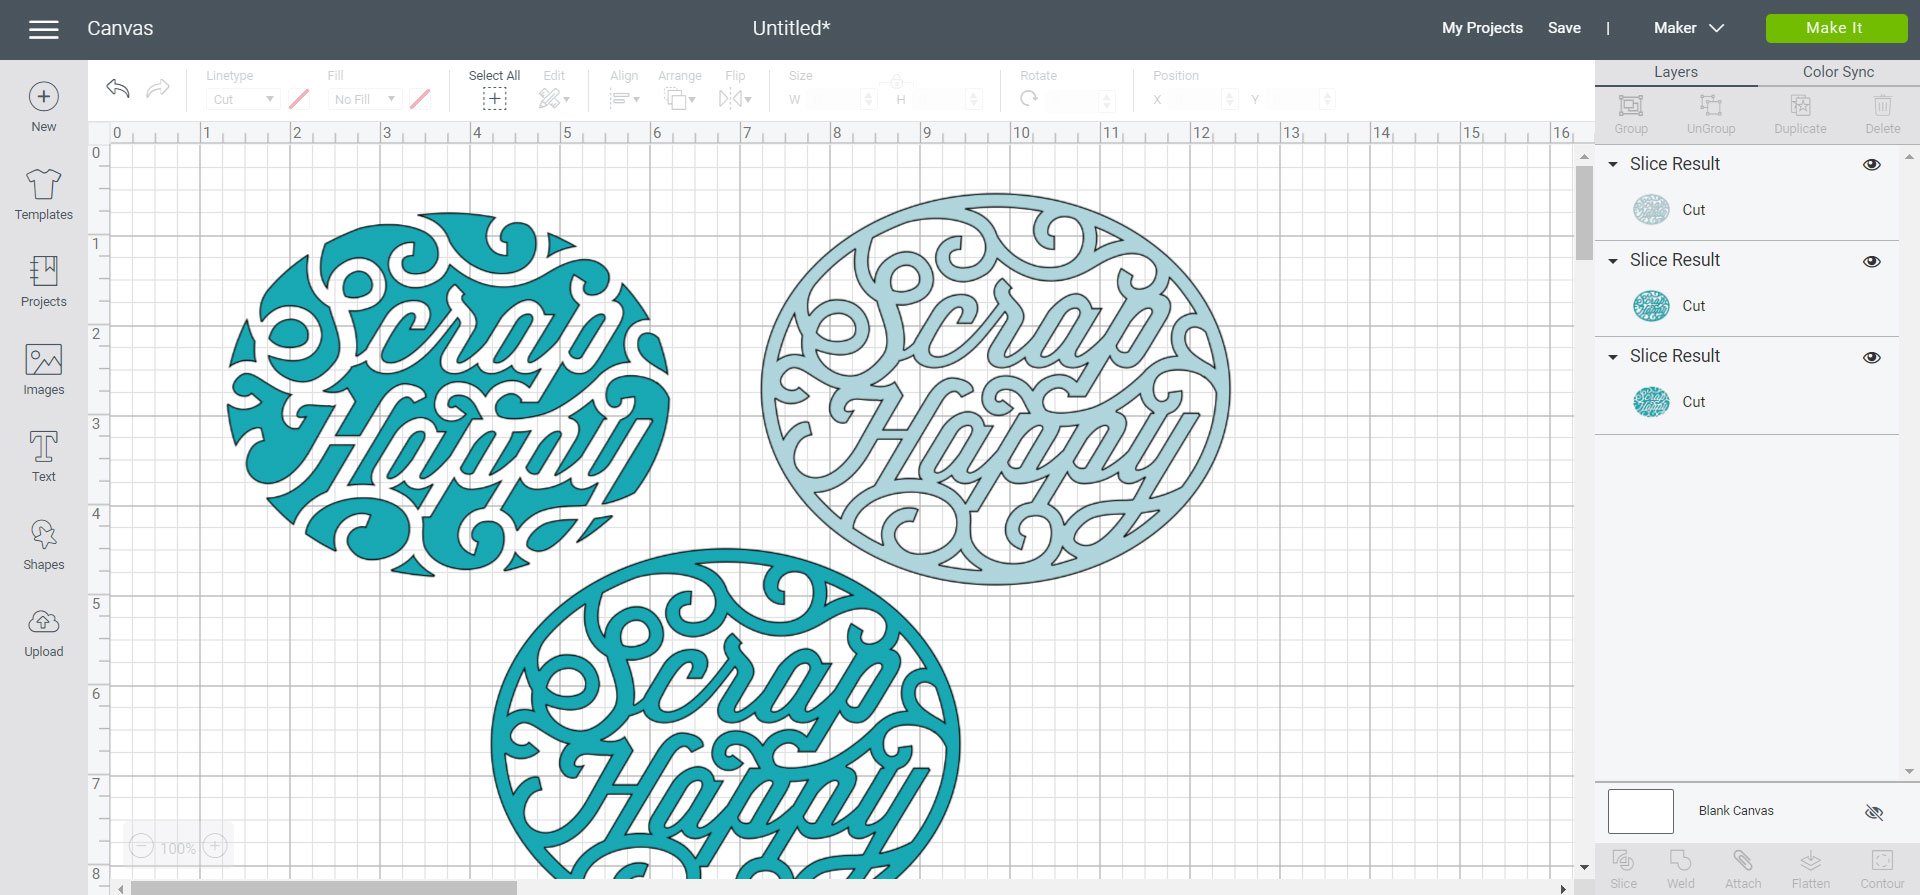
Add a 2 layer image to your canvas. I chose this cute Scrap Happy oval from the Close to My Heart cartridge. The bottom layer is a solid oval, and the top is the design. If you wanted to layer two different glitter iron-on colors to create your design, you will need to create the look of layers without actually layering your material.

Select both layers in the layers panel by either dragging over the image using your mouse, or holding down the CTRL key when you select each image.
Once you have both layers selected, click Slice at the bottom of the Layers panel.

In the layers panel, you now have three separate layers which each say Slice Result. When I move the layers you can see how you no longer have a solid oval but a cut out of the negative space from inside the design.
To actually cut your design from iron-on, you can delete the part of the design that was cut out from the oval as you will not need it for your final design.
Helpful tip: The sliced layer to delete usually looks exactly the same as the top layer of your design, but will be the same color as the bottom layer. Duplicated layers only occur when using the desktop version. On the iOS or Android app, the sliced sections will not be duplicated.
If you compare an unsliced version to the sliced version of the image, they look exactly the same on the canvas. However, when you actually pull the layers apart you can see in the sliced version that no parts of the design actually overlap.

How to Use the Slice tool with more than 2 layers
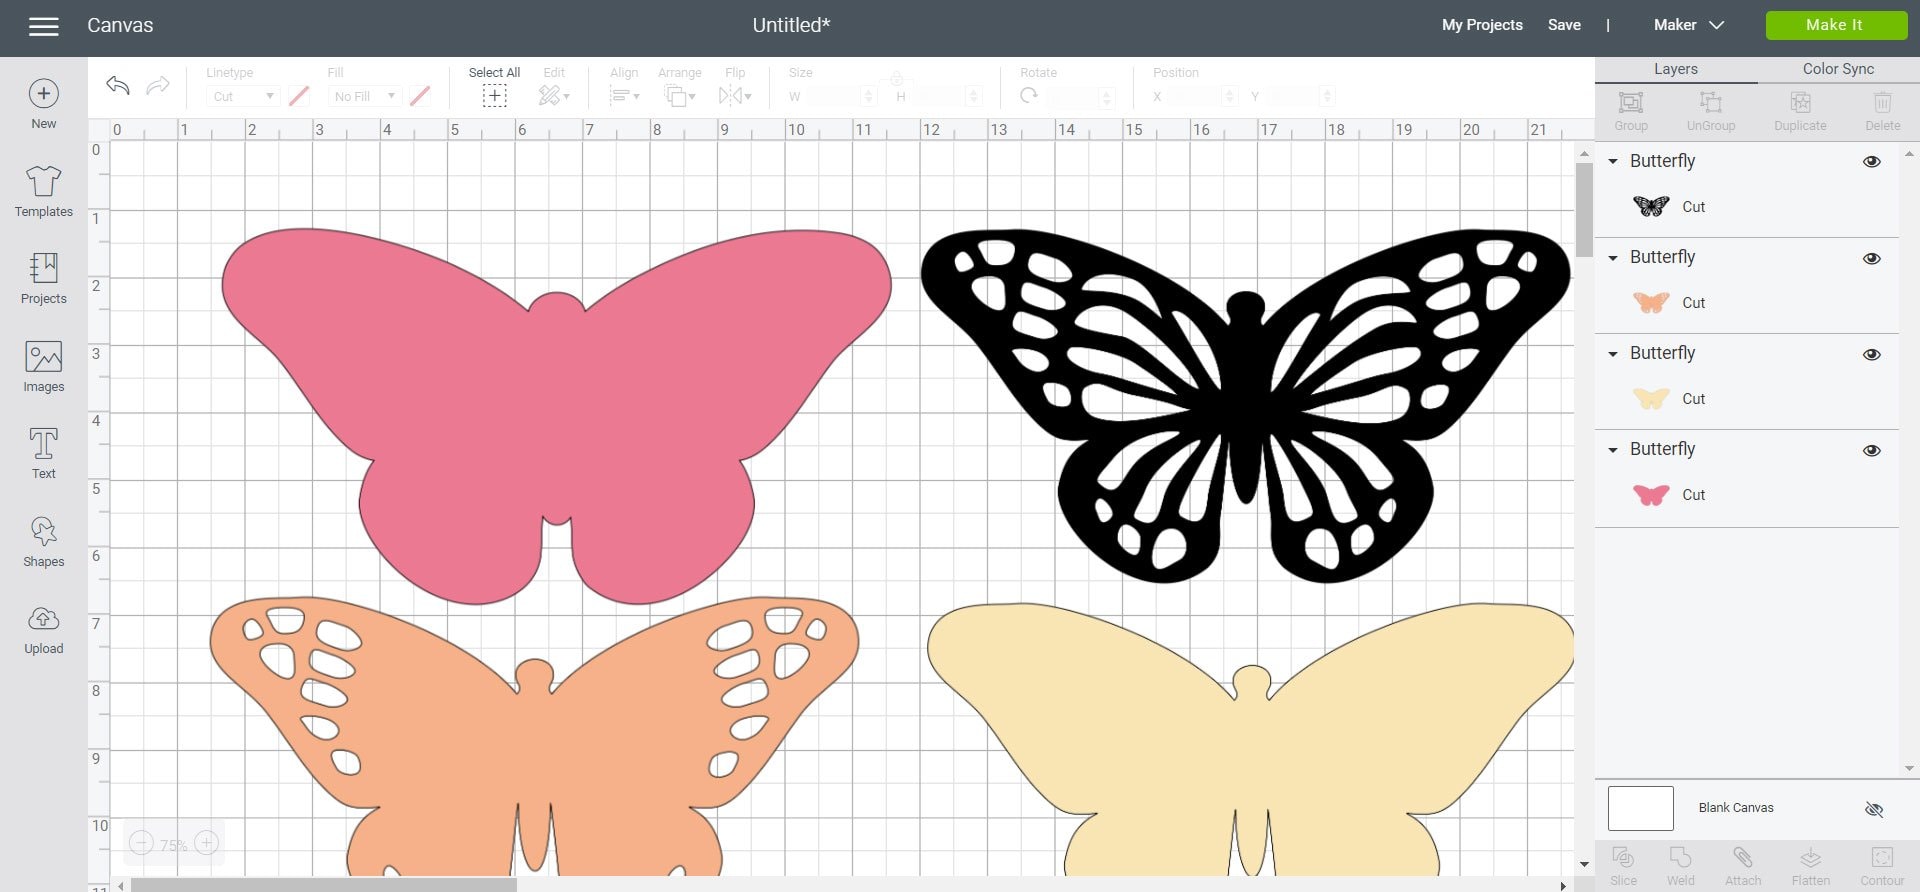
You may have a design that has more than 2 layers, like this butterfly from the Picturesque cartridge. This design has 6 layers, 4 of which are hidden.

Related: How to Make a Butterfly T-Shirt with this Design
First, start by unhiding all the layers. You do this by clicking the eye next to each layer. Next, delete any layers you do not want in your final project. I find it helpful to Ungroup the image first so each layer is separate.

I now have four separate layers to my design, all of which overlap each other.
Note: If you do not ungroup your design before slicing and have all the layers selected, the hidden layers will be deleted when you use the slice tool.
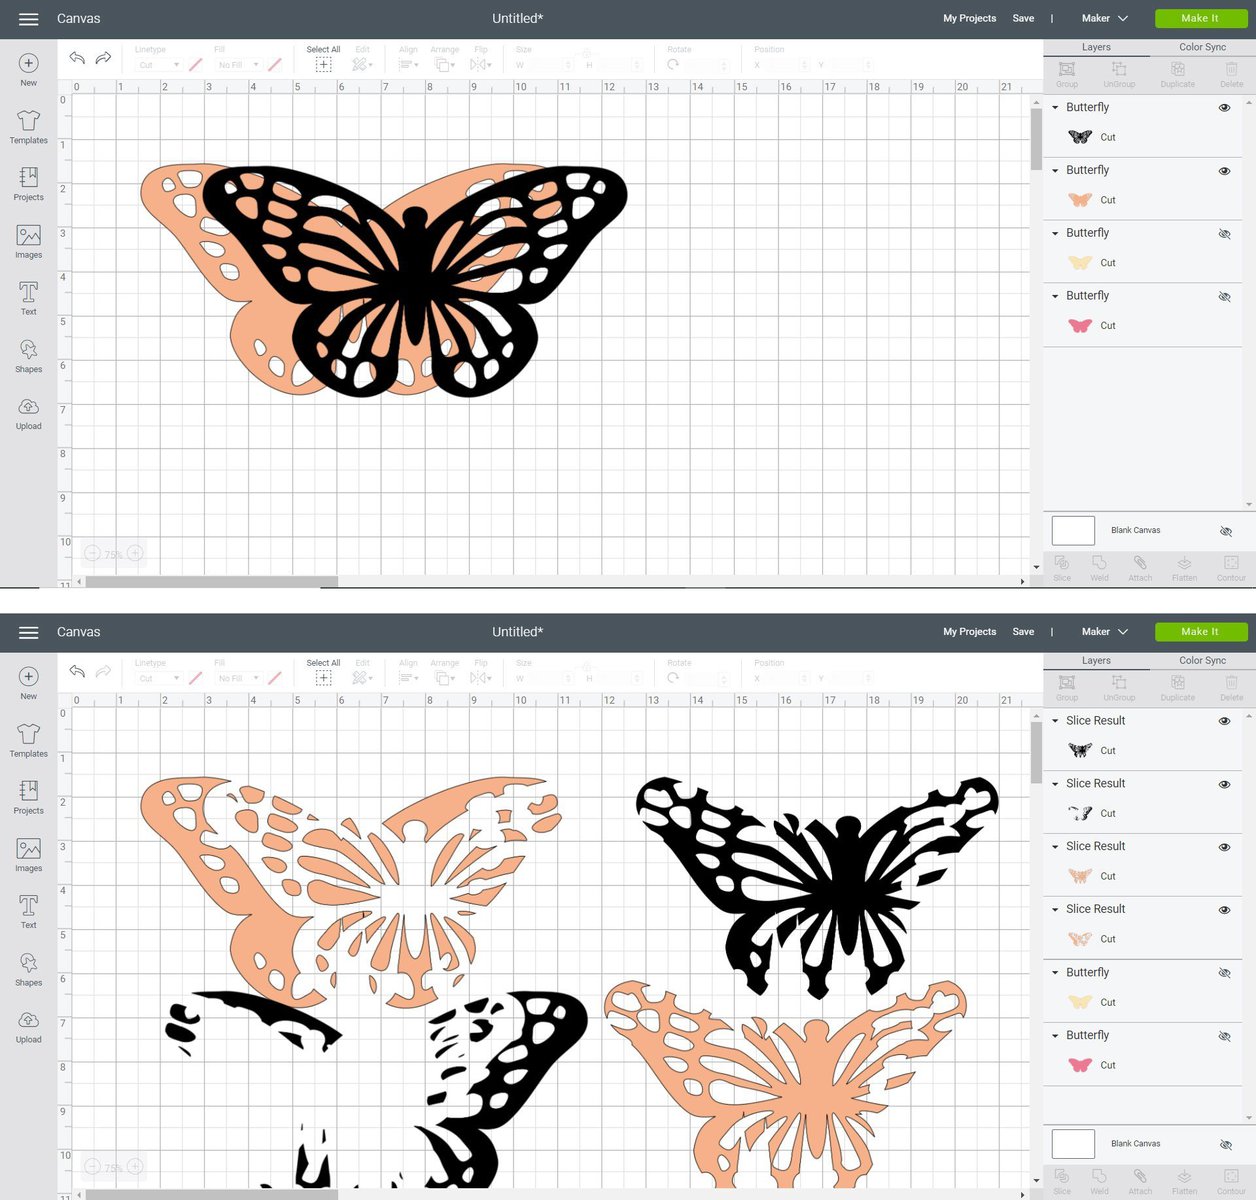
Make sure your design is lined up before using the slice tool or your images will not slice in the way you want them to. For example, below you can see the butterfly edges are not lined up. If you use the slice tool now, it will slice the designs exactly as they are shown on the canvas, which is not what we want.
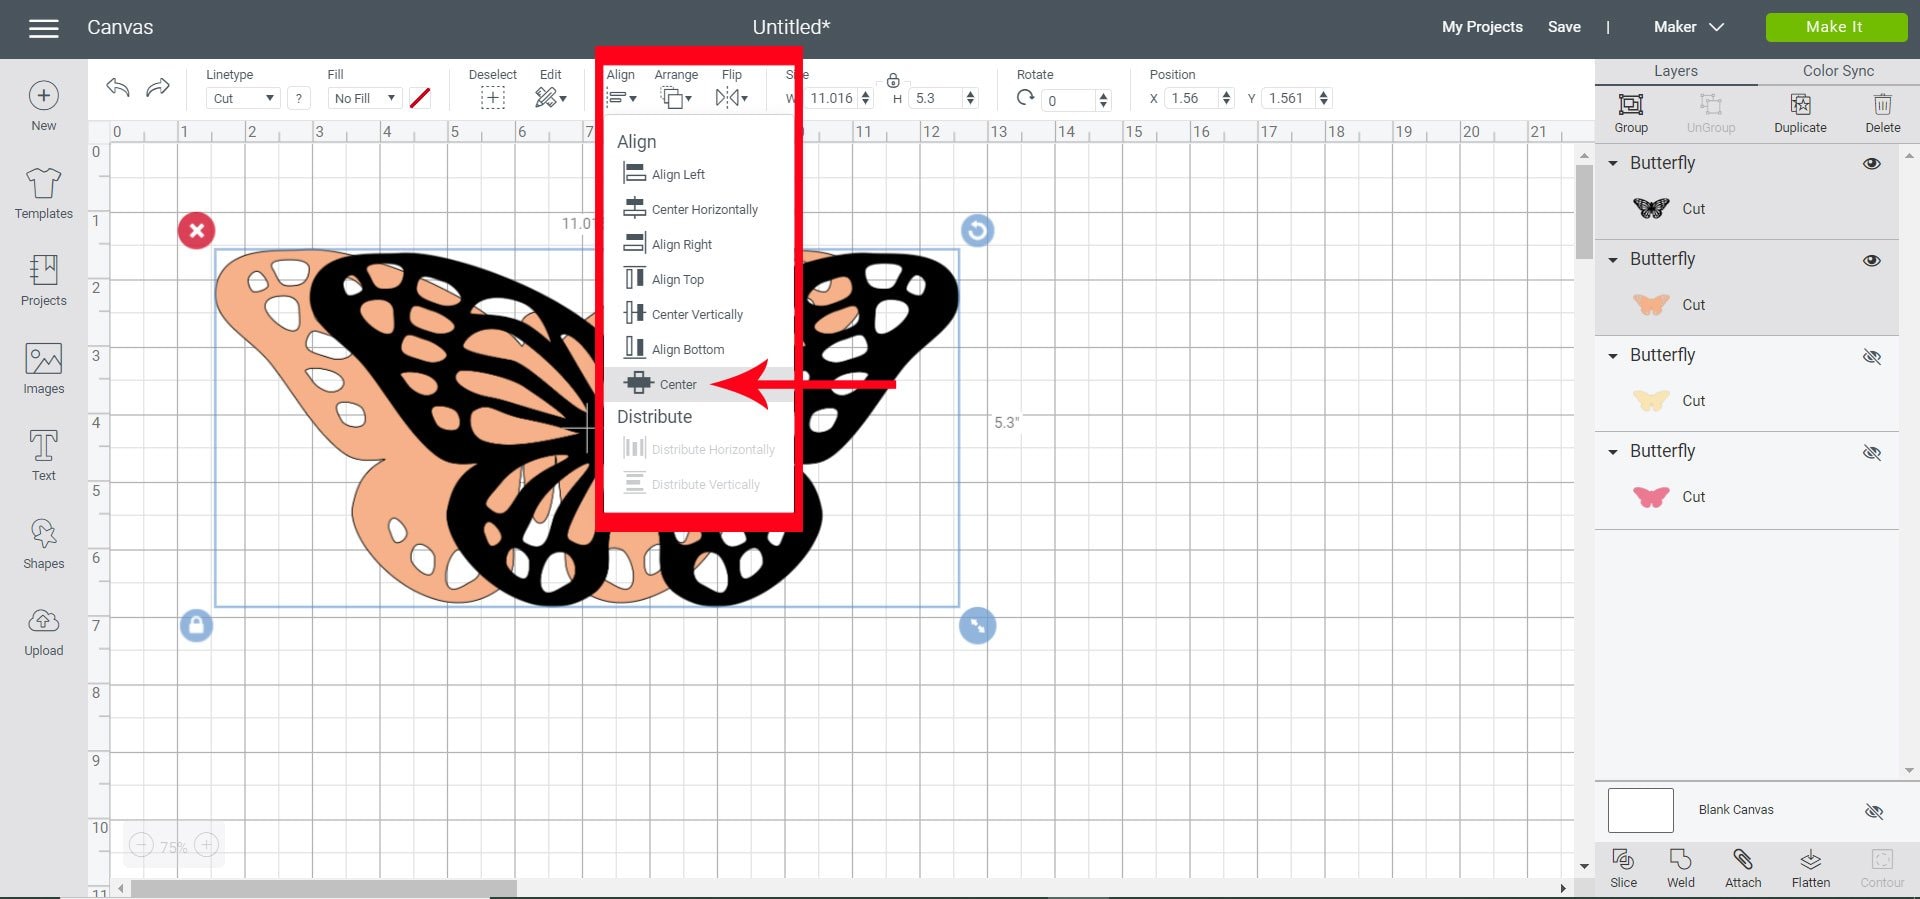
To make sure your designs are aligned before beginning, start by clicking Select All at the top. Then, click Align and choose Center from the drop-down menu.
Then, select two of the layers, and click Slice. Delete the duplicate layer you don’t need and repeat the above process for the other two layers.

Helpful Tip: It can take some trial and error to figure out what two layers need to be used. I find it easiest to hide all but two layers to see if I will get the effect I want. Also, be sure to double-check which layer is on top when slicing as that determines the final result. Use the Arrange tool to adjust which layer is in front and which is in the back.
Below, you can see the difference between the sliced design and the layered design.

Check back and subscribe to my channel for more Cricut Design Space Basics tutorials each week.
Save this Video on YouTube: https://youtu.be/jmrGCSkRuPsYou may also like:
Leave a Reply