Updated on May 9, 2024
Toilet Paper Roll Butterfly. Make this adorable butterfly craft from recycled toilet paper roll tubes, a glue gun, and paint.
Does anyone else save all the things because you might be able to “make something with it someday”?
When we moved last year, it became clear that I am a craft supply and recycling hoarder of supplies. I recycled a lot because I hadn’t used those supplies in years. But I do hang on to a few toilet paper and paper towel rolls (along with glass jars), just in case I need them for crafts!

This post contains affiliate links. If you purchase something through the link, I may receive a small commission at no extra charge. Please read my full disclosure policy.
Toilet Paper Roll Butterfly Craft
Today, I will show you how to make these adorable butterflies from a toilet paper roll. They need only a few simple supplies, are easy to make, and can be a fun craft for kids of all ages*!
*Since this craft uses hot glue and scissors, have adult supervision if kids are doing this craft. You can also use regular glue in place of the hot glue.
Supplies:
- Empty Toilet Paper Roll (or Paper Towel Roll)
- Hot Glue Gun and Glue Sticks
- Paint
- Paintbrush
- Wire (optional)

Create Cardboard Strips
Start by flattening the toilet paper tube.

Mark every 1/2″ on the tube with a ruler and pencil.

Use scissors to cut strips from the tube using the marks you made with a guide. They don’t have to be perfectly straight.

Glue Strips Together
Take two of the folded strips and glue them together near the bottom fold. Repeat this step to create two sets of butterfly wings.

Note: You can also use regular glue to assemble the butterfly. I would recommend a quick-drying glue like Aleene’s Quick Dry Tacky Glue. Use clothespins to hold the pieces together while they dry.
You will now have five strips left over to create the butterfly’s body; you will need three of these strips.
Cut one of the strips at each fold line to create two pieces. Then, fold the piece in half and glue at the bottom to hold the folded piece together.

RELATED: More Butterfly Crafts
For the other two uncut strips, fold each in half a second time and hot glue in the middle of the fold to create a V shape.

Assemble the body. You will have a top and bottom half. Glue one of the cut strips inside the folded strip. Glue the top and bottom halves together.

Paint Cardboard Pieces
Paint the butterfly pieces. I started by painting the body a light brown and the wings a navy color. Let it dry.

Plaid Paint Colors:
Apple Barrel Territorial Beige, FolkArt Galaxy Blue, Dragonfly Glaze Violet-Blue-Green Shift, Glitterific Aqua

I love sparkle and shimmer and added Dragonfly Glaze to the wings. I did two light coats over the navy paint.
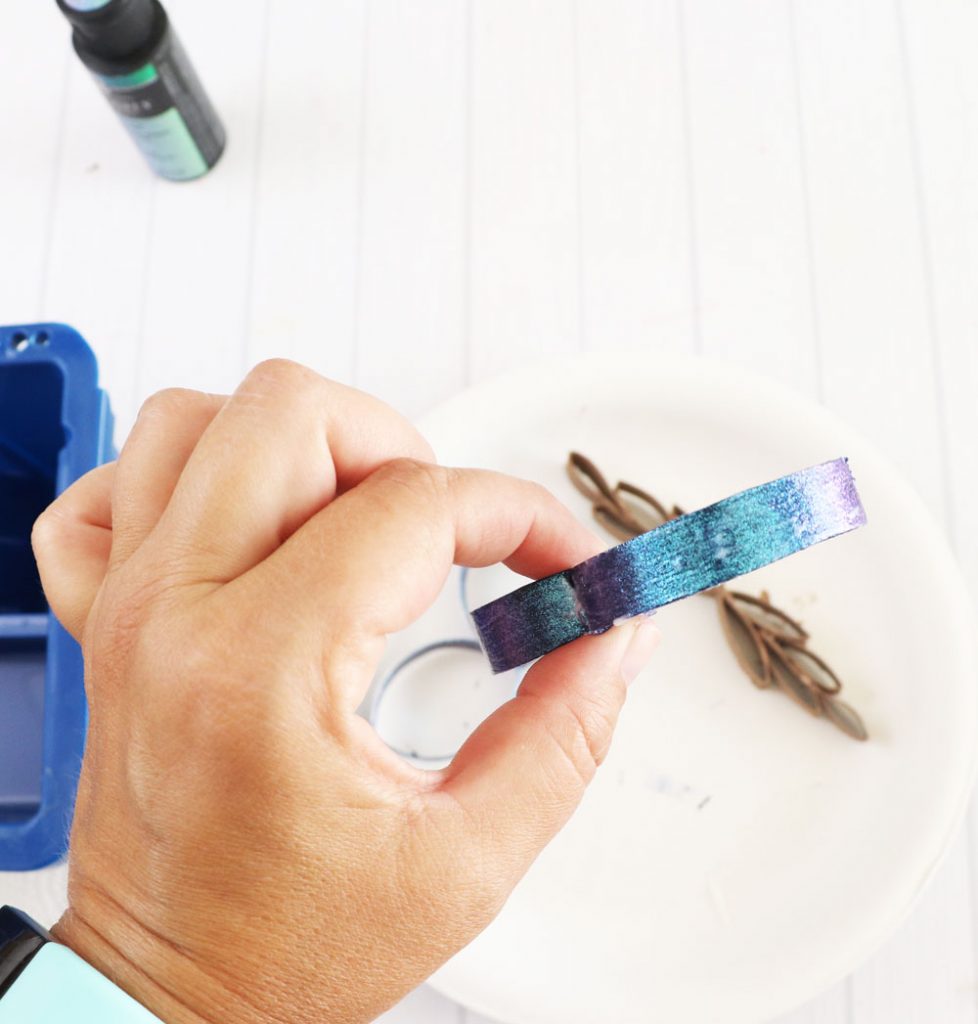
Once the Dragonfly Glaze was dry, I added Glitterific paint to the edge of the wings. Dipping the paintbrush directly into the bottle is best to get good coverage.
Note: You could also use glue and glitter to create a similar effect on the wings. Dip the edge of the wing in glue and then into your glitter.
Assemble Butterfly
Once everything is dry, glue the butterfly together. Use hot glue to attach the wings to the body.

I used some wire to create an antenna for the butterfly.
Bend the wire in half and roll the ends using the paintbrush handle. I hot-glued the antenna to the backside of the butterfly. This isn’t necessary but adds a fun touch.
If you don’t have wire, you could also use a black pipe cleaner to create the butterfly’s antenna.

I love using what I have to create something fun in the craft room. It would be beautiful to create a bunch of these butterflies and make a hanging mobile out of them.
Enjoy this spring craft!

Creative Crafts Recycle Edition
This recycled craft is part of Creative Crafts Recycle Edition. Creative Crafts is a series hosted by Me and My INKlings and Makeable Crafts. The guest host this time is Creatively Beth. Some of your favorite crafters come together to create crafts around a specific theme! Be sure to check the hosts’ blogs all week for more easy and quick recycling crafts.

You may also like:
Laura Walters says
So adorable! Thank you so much for participating!
Laura Silva says
Thank you for hosting such a fun blog hop!
xo,
Laura