Updated on May 3, 2024
Disclosure: This is a sponsored post written by me on behalf of Cricut. This post contains affiliate links. Please read my full disclosure policy here.
I was challenged by Cricut to DIY a lampshade using my Cricut Explore. You all know I love butterflies, so my wheels were instantly turning to create a 3-D butterfly effect on my lampshade. I wanted the effect to be subtle and elegant. I knew I could create this look by using white on white on my butterfly lampshade.

Supplies needed:
- White lampshade
- Cricut Explore
- Cricut mat
- Iron-on vinyl, White Glitter
- Iron and ironing board
- White cardstock
- Vellum
- Hot glue gun and glue sticks
To start with I created a design in Cricut Design Space™. I found a beautiful butterfly design that had a diagonal row of cascading butterflies in different sizes. I measured the height of my lampshade and altered the height to match. My lamp shade is 7.5″ tall, so I made the design 7.45″ tall.

Cricut Design Space File: Butterfly Lampshade
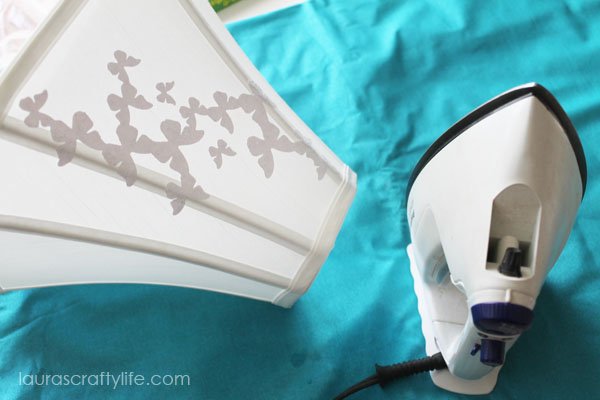
I cut out two sets of the butterflies on white glitter iron-on vinyl with my Cricut. Be sure to select mirror image for your design or it will cut backwards. Place the shiny side of your vinyl down. Set the custom dial to iron-on and cut out your design.

Weed out all the excess iron-on material from the clear backing and iron-on to the lampshade.

Note: When cutting vinyl I usually place a rectangle around my image and attach the rectangle to my image. This way I can easily weed my vinyl and cut it out to iron it on to my lampshade.

I added the two pieces of iron-on vinyl on opposite sides of the lampshade. I love how the butterflies wrap around the lampshade.
Then, I found an intricate butterfly shape I really liked. I matched up the size of the single butterfly with the larger butterflies from the iron-on design and cut out five butterflies from both plain white cardstock as well as vellum for each side of the lampshade (so, twenty butterflies in total).

Once you have both sets of butterflies cut out, bend the wings up a little to create a 3-D effect.

Use hot glue to adhere the vellum butterfly on top of the cardstock butterfly.

I then glued the two glued layers on the larger butterflies on the iron-on design. I used my Cricut weeding tool to hold the butterfly on the lampshade while it dried so I didn’t burn my fingers.

I think the lampshade turned out beautiful. It will work well in our living room, in my craft room, in my bedroom or even my daughter’s room. The silhouette of the iron-on butterflies look really pretty when the lamp is turned on.


You may also like these other Cricut projects:
Shelly Clement says
I really, really like this … I think I might try this on my “oriental lampshades! Thank you for giving us how to …………
Laura Silva says
Shelly,
Thanks so much! I would love to see your finished lamp. You can share it over in our Creative Community on Facebook.
xo,
Laura