Updated on September 15, 2023
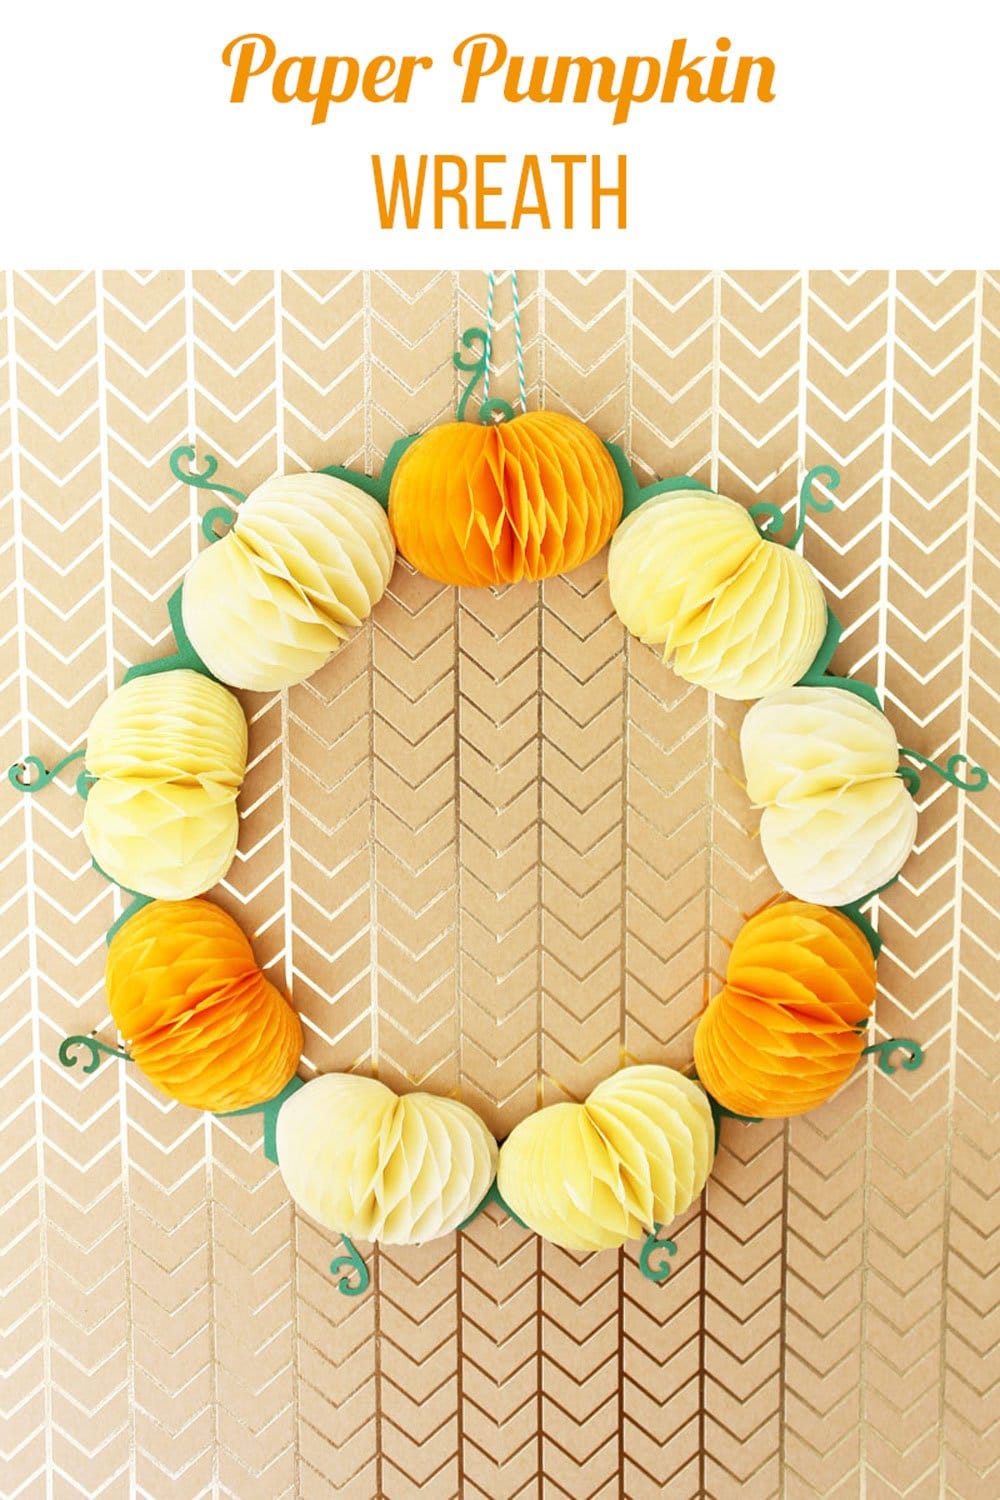
Paper Pumpkin Wreath. Create a paper pumpkin wreath using supplies from We R Memory Keepers. The little pumpkins are perfect for your fall decor!
The Halloween decorations are put away and I brought back out the fall decor for Thanksgiving.
One of my favorite things to make and decorate with is wreaths. They provide a cheery welcome to everyone that comes to your home. I created this paper pumpkin for the We R Memory Keepers blog. I love it so much and I have been able to have it hanging up since September!
This post contains affiliate links. If you purchase something through the link, I may receive a small commission at no extra charge. Please read my full disclosure policy here. I received product and payment for being on the We R Memory Keeper’s Design team.
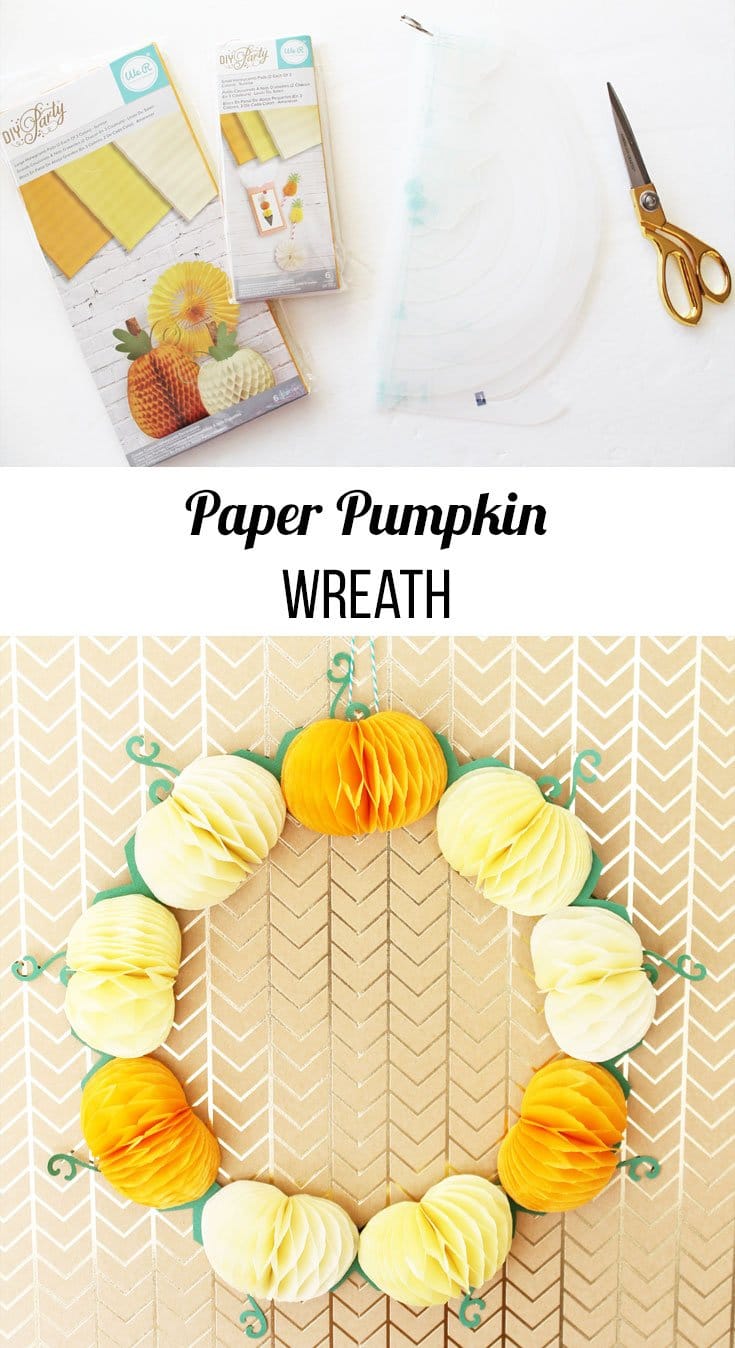
Supplies:
- DIY Party Honeycomb Pads, Sunrise
- DIY Party Honeycomb Stencils
- Green Cardstock
- Decorative Font Punch, Elegant
- Green and White Baker’s Twine
- Adhesive
Note: The honeycomb pads are no longer available, but you can use pre-made honeycomb balls to create the same effect.
To start, I used the sunrise honeycomb pads and the honeycomb stencils. I used the small honeycomb pad, but you could also easily make a larger version of this wreath by using the large honeycomb pads.
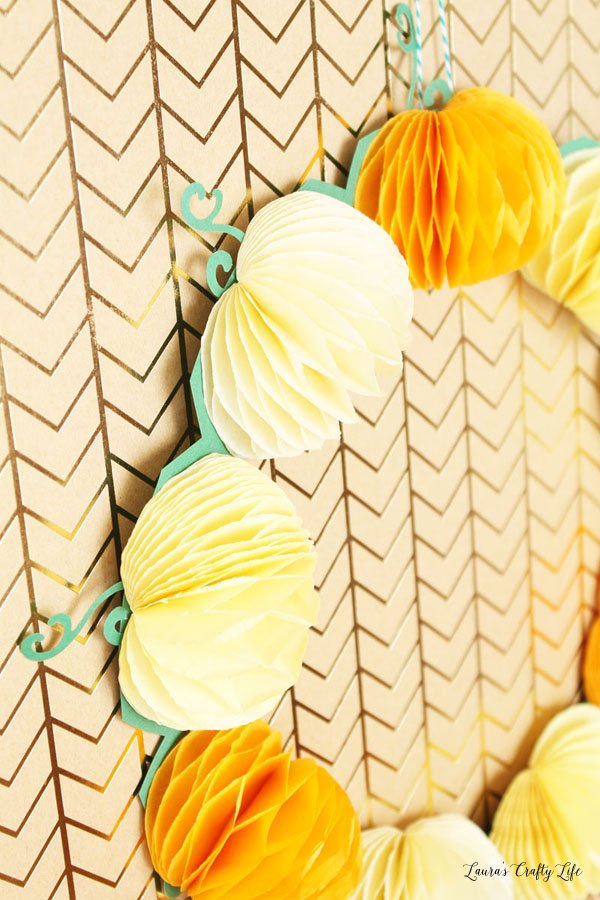
On each honeycomb pad, trace the smallest of the pumpkin stencil shapes, for a total of three pumpkin shapes on each pad – orange, yellow, and cream.

Helpful Tip: Be sure to trace your shape on the adhered edge.
Cut out each of the shapes using scissors for a total of nine pumpkins.

Next, you will create your paper wreath form. I used green cardstock and the circle template from the honeycomb stencils. I used the largest circle shape possible to create the wreath form. To create a more sturdy base you could also use foam poster board as your base.
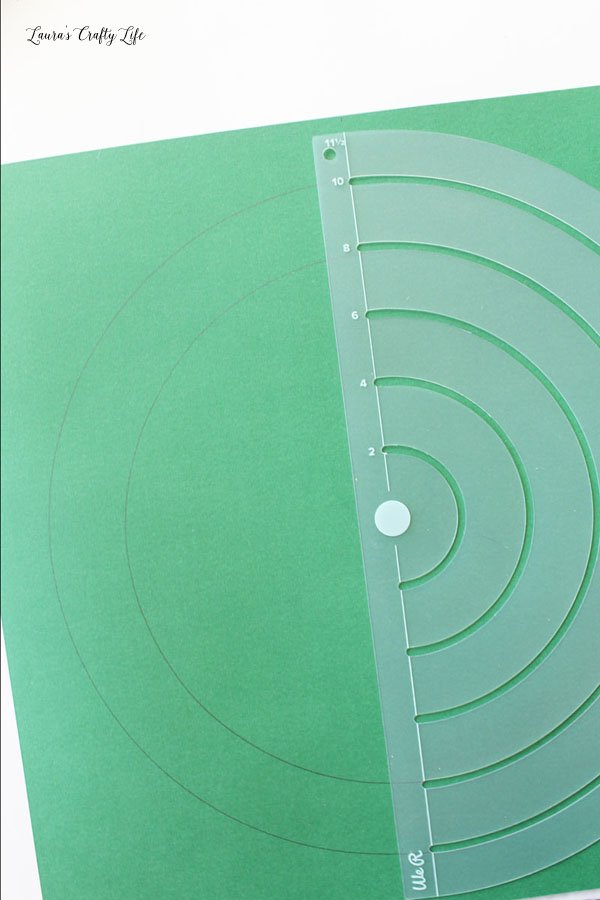
Cut out around the outer circle and the inner circle to create your wreath.

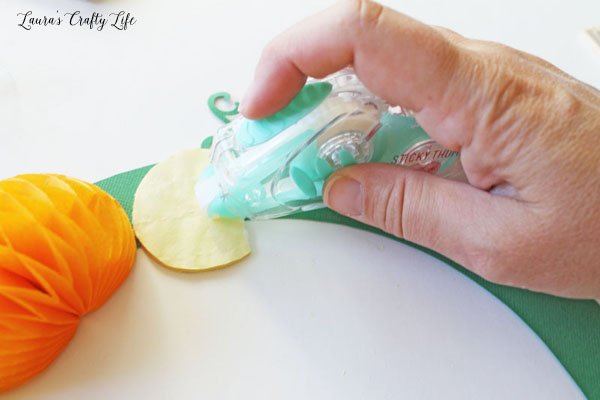
I wanted some sort of stem or vine shape at the top of each pumpkin. The decorative font punch I have was perfect for this. I used the leftover paper from creating the wreath form to punch out nine vines.
Related: More DIY Wreath Ideas


Using my sticky thumb adhesive I attached the green vine to the top edge of the wreath form.
Then, I added each pumpkin shape by using adhesive on either side of the pumpkin shape and pressing it down firmly on the green ring. I repeated this process around the entire wreath, alternating the colors of the pumpkins.
I snipped the excess green paper from in between each pumpkin shape in a ‘V’ shape.

Lastly, I attached a green and white twine loop using a piece of clear tape on the back to create a hanger for my wreath.

To dress up the wreath for Halloween, you could add some little cut-out shapes to create jack-o-lantern faces on some or all of the pumpkins. For now, though, I love this little pumpkin wreath just as it is.
You may also like:

Leave a Reply