Updated on October 26, 2018
Disclosure: I wrote this post as a part of a sponsored campaign with Plaid Crafts and The Blueprint Social. All opinions and love for Martha Stewart Crafts are my own.

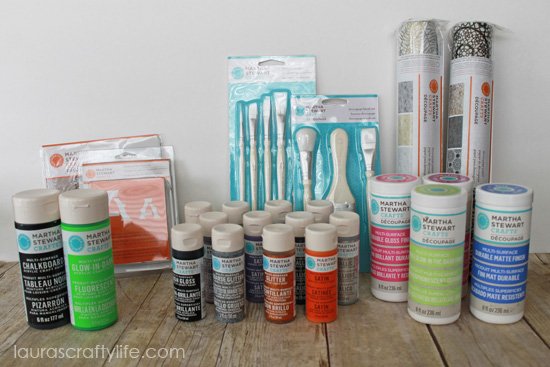
A few weeks ago I received an awesome box of goodies including Martha Stewart Decoupage medium, papers, tags and brushes. The wheels in my mind immediately started spinning with all the fun things I could do with these supplies. The great thing is Martha Stewart Crafts ® Decoupage Formulas and Finishes can be used on any surface such as glass, fabric, paper, metal and wood to create a lustrous finish, so I had a lot of options for surfaces I could cover.
With my son’s Halloween birthday party coming up, this was the perfect opportunity to dress up our table I use as our faux mantel. It is the first thing you see when you walk in the house and will perfectly set the stage for our spooky party!
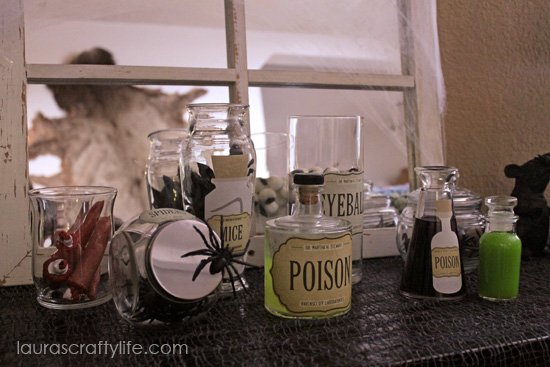
I made two different projects for my display. The first was to create apothecary jars to show off some of our creepy finds.
Halloween Apothecary Jars
Supplies Needed:
- Glass jars in various sizes
- Martha Stewart Crafts Decoupage* (gloss finish)
- Martha Stewart Crafts Decoupage brush set
- Martha Stewart Crafts Decoupage paper cut outs
- Damp cloth or paper towel
(*Martha Stewart Crafts Decoupage products are available at Michael’s.)

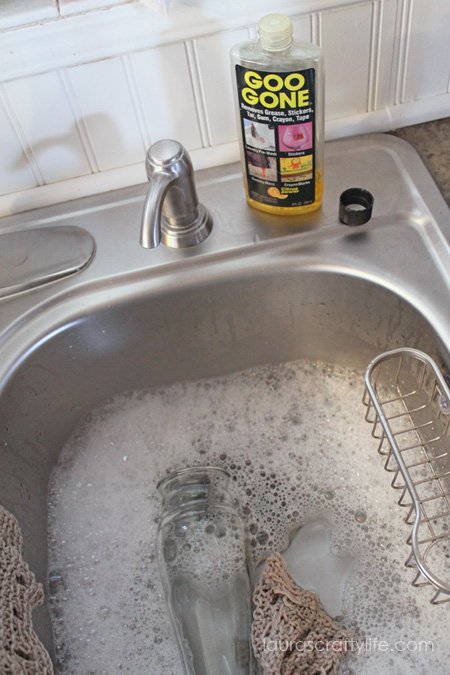
Step One: Wash and thoroughly dry your glass jars. You can remove stickers easily by soaking them in water or using something like Goo Gone. If you use an adhesive remover, be sure to remove any residue it may leave. You can further clean your jars by wiping with rubbing alcohol and allowing to dry.
Step Two: After choosing which paper cut-out you want to use on your jar, brush the decoupage medium onto the back of the paper. You want a thin coat, but be sure to coat the entire surface all the way to the edges.

Step Three: Smooth your paper cut-out onto the glass. It helps to start smoothing from the middle and working your way out to avoid wrinkles and bubbles.
Step Four: Apply a thin layer of decoupage medium over the surface of your paper cut-out.

Step Five: Use your damp paper towel to wipe off any excess decoupage, staying close to the edge of your paper cut-out.

Step Six: Allow to dry for 1 – 2 hours. Then reapply additional coats (2-3) of decoupage medium, waiting 1 – 2 hours between coats.
After curing for 28 days, all of these decoupage formulas are dishwasher safe, machine washable, non-yellowing, dry hard with no tack, and can be used indoors or out.
After the jars were dried, I filled each one with the appropriate eerie, creepy, crawly specimen. I used severed fingers, plastic spiders, mice and snakes, slime, gooey eyeballs, and purple kool-aid to fill my jars.


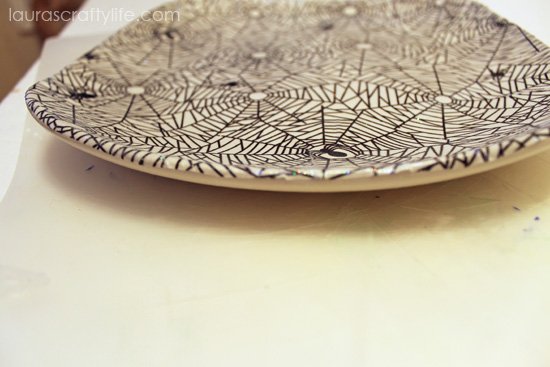
The second project I created was a sparkly spider plate. I used a plate stand to display it in my design.
Spooky Sparkle Spider Plate
Supplies Needed:
- Plate
- Martha Stewart Crafts Decoupage (gloss and glitter finish)
- Martha Stewart Crafts Decoupage brush set
- Martha Stewart Crafts Decoupage paper

(You will see the glow-in-the dark decoupage in this picture, but I changed my mind and decided to use the glitter decoupage instead since it wasn’t going to be dark for our party.)
Step One: Wash and thoroughly dry your glass plate. You can further clean your plate by wiping with rubbing alcohol and allowing to dry.
Step Two: Cut your paper to roughly the size of your plate. Don’t worry about making it perfect right now, just get the general size right. Apply a thin coat of decoupage into your plate. You want a thin coat. Start at the middle and work your way out.

Step Three: Smooth your paper cut-out onto the glass. It helps to start smoothing from the middle and working your way out to avoid wrinkles and bubbles. Apply your decoupage to the middle of the plate, apply your paper and lift the edges to apply more decoupage under the paper until you reach all edges.

Note: You will notice in this picture I tried to add the decoupage all at once to the plate. By the time I reached the edges it was too dry. When doing a large area, you need to work in sections to be sure you get good adhesion.
Step Four: Apply a thin layer of glitter decoupage medium over the surface of your paper.

(After 3 coats of glitter decoupage)
Step Five: Allow to dry for 1 – 2 hours. Trim the excess paper by using a craft knife or scissors.

Then reapply additional coats (2-3) of decoupage medium, waiting 1 – 2 hours between coats. Be sure to coat under and around the edges so it doesn’t peel up.
Allow to cure for 28 days to be dishwasher safe.

To put the whole display together, I started by laying down ‘creepy cloth’ over my table. I used my framed mirror I picked up at a yard sale over the summer as the back drop. I added my apothecary jars and my sparkly spider plate. Just for fun, I added a glittered black pumpkin and two large plastic rats. I stretched out spider webs over the mirror and around the table. I added a few plastic spiders to my table and the plate. For the wall, I added paper cut-outs of spiders that I simply taped to the wall with double-sided tape.


Get ideas from fellow crafters on Plaid’s Facebook Page and follow Plaid for Inspiration on Pinterest.


![]()
![]()


Mandy @ Sugar Bee Crafts says
Thanks for linking to Take-A-Look Tuesday over at Sugar Bee Crafts – you were featured today!
–Mandy, SugarBeeCrafts.com
Lauras Crafty Life says
Thank you so much Mandy! Love your blog. :)
Britni says
I love that spider plate, might have to try making one myself. Thanks!
Britni @ Play. Party. Pin.
Lauras Crafty Life says
Thanks! It was really super easy and quick. The Martha Stewart paper is so fun and festive.
katie says
Ahhh I love this spooky halloween plate and the entire display!
Lauras Crafty Life says
Thanks so much! I am having so much fun decorating for Halloween and my son’s party!